31st July 2024
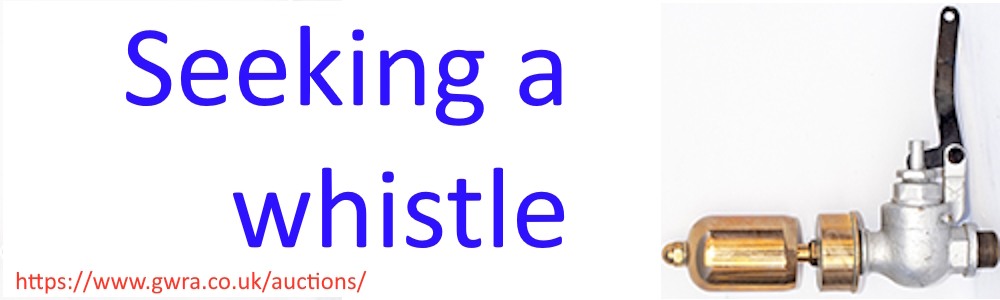
It is quite likely that the whistle in your steam launch is probably the item that involves the greatest attraction for the non steam boater. It turns heads and generally makes viewers take an interest in your launch. Thus it is likely that all of us who have, or are still building, steam launches will have sought out a nice melodic whistle that we will use whenever we can.
The only trouble is that vintage whistles are hugely expensive because there is a large body of dedicated people who collect them, lovingly restore them, and then seek another one. There are, of course, new whistles to be had but given the going market rate for ‘used’ ones, their prices are also pretty high. Thus the question of how to get a whistle for the mono-tube boiler I am building then came down to bruising the bank account or following the DIY route.
The Internet is awash with material on building whistles, especially from wood. It also turns up a great many YouTube videos on whistle building but the few I examined did not leave me a great deal the wiser. Homing in on ‘making brass steam whistles’ provides another pile of interesting links, and even a foundry forum considering how to make patterns for casting the brass parts. That seemed rather too far away from the objective of ‘Simple’, ‘Cheap’ and ‘Decent looking’ which were my starting criteria.
 |
Looking at Iacopo Giangrandi’s site (Ref 1) I began to be more hopeful of finding some useful instructions. The site included the design for an organ pipe style whistle (Fig 1) which was dimensioned, but all based on copper plumbing pipe. That design was filed under the ‘possible’ category and some more of the links were explored. Many of the forum sites included links to plans or other guides but most of the links were dead. However, Home Model Engine Machinist (Ref 2) had a fairly useful discussion and a ‘key’ link (Ref 3).
The ‘key link’ site was created by Johan Liljencrants who sounds like a musical instrument maker. He has provided a clear drawing for a single tone ‘bell’ whistle (Fig 2) and discusses the key parameters in whistle design; length, diameter, mouth, flue, inlet and valve as well as notes on pitch and correction. The Home Model Engine Machinist forum also included a sectional drawing of a traditional Lunkenheimer bell whistle which was small and possibly just the sort of thing I would like. However, such whistles are cast brass and that is way beyond my modest metal working skills. Thus Johan Liljencrants fabricated bell whistle design rose to the top of my ‘possibilities list’ being a Lunkenheimer clone.
 |
The same forum that turned up Johan’s design mentioned that there was a Yahoo Whistles forum. Some extensive searching suggested that the Yahoo Whistles Forum may no longer exist. A further post mentioned that in Guy Lautard's “Machinist’s Second Bedside Reader” there was an annotated a drawing for a small Lunkenheimer whistle (Ref 4).
With that suggestion it was necessary to immediately look up the book since it sounded as if it might just be the sort of volume to expand my limited machinist skills. That assumption turned out to be correct, although one should perhaps start with the first volume. Unfortunately, whilst both volumes are available from various book sellers and Amazon, the latter wanted £136.85 for book two. Abe Books was offering Book One for £39.06 and Book Two for £47.85. Given that the whole idea of this project was not to spend a vast amount of money for something that might not be suitable it looked as if a Plan B was required.
Fortunately, the liberal element of the US west coast believes that things like books are too important to be the preserve of the rich. Thus there are a number of sites that bill themselves as libraries and allow people to sign up as borrowers. I was a member of one called the Internet Archive [https://archive.org]. This happened to have both books available and thus I was able to read the chapter on the Lunkenheimer whistle. The text was a good read but by no means a DIY whistle building treatise. The drawing, which took up a full page, was really too small to clearly identify the dimensions. As a solution I changed to full screen and then took a screen grab. Editing out the margins and then printing out at A3 meant that the imperial dimensions were at last visible. That picture was then used as an underlay in CAD to produce the more legible drawing above (Fig 3).
 |
The next element in the saga was a friend who, hearing that I was considering making a whistle, dug out an article by Bob Bramson from the Society of Model and Experimental Engineers (Ref 5a). The later updated version was kindly supplied by the author. This was a most useful piece of work although aimed at the model locomotive fraternity and has lots of useful tip plus a clear design for an organ pipe style whistle (Fig 4).
 |
This was quite similar to the Giangrandi design which was encouraging and suggested that it would produce a satisfactory whistle. A final design of a similar style was offered by McDaniel (2011) as almost an aside to his technical article (Fig 5). Unlike the others, McDaniel provided no dimensions on his drawing. In tracing the drawing in CAD for this article it became possible to add dimensions. The drawing has been adjusted slightly to give round(er) dimensions.
Having collected and read all these resources it would probably be sensible to bring to gather all the design advice in one place.
First, the technical terms used need to be explained:
 |
Bell or resonator– The top part of the whistle that is important for the tone.
Mouth – The aperture through which the steam escapes to atmosphere.
Windway or slit – the narrow slot from which the steam emerges into the mouth.
The Languid or spreader plate – the disc at the base of the mouth that is somewhat smaller than the diameter of the bell making room for the Windway.
Cut Up – The distance between the bottom of the bell and the languid for bell type whistles or the vertical length of the ‘mouth’ for organ pipe whistles.
Unity Cut Up – this is when the area of the mouth is equal to the cross-sectional area of the bell's internal diameter. Unity cutup provides maximum sound output for minimum air/steam consumption. (McDaniel (2011)).
Bowl or Foot – the area below the Languid into which the steam initially flows.
Working Length – The distance from the languid plate to the inside top of the bell.
Scale – This is the working length of the whistle bell divided by the internal diameter of the bell.
Organ Pipe Whistle – a whistle that uses a mouth of substantially less than 360 degrees for the purpose of conserving air or steam without reducing the sound output. These have proportionately higher cut ups.
The various articles also have some ‘rules of thumb’ on which to base the design of a whistle.
It is suggested by Giangrandi (2012) that “Dimensions are not critical: higher mouth requires more pressure; a wider mouth makes a louder sound but requires a higher flow. The dimensions of the foot have no influence on the whistle. The length of the resonator gives the pitch and can somehow be adjusted by sliding the top cap before soldering it into place.”
By comparison Liljencrants (2006) is much more specific. “The most basic measure is the length L, internally from the closed top of the bell down to the languid plate. This sets the pitch of the whistle, it closely equals a quarter wavelength of the note produced. The pitch, alternately note, or frequency F, is measured in Hertz, the same as cycles per second. Knowing F you find wavelength as c / F, where c is the speed of sound. The nominal length L of the bell actually has to be made shorter than a quarter wavelength, because air outside the mouth will take part in the resonance motion of the bell air column. For this particular design with 3:1 scale this 'end correction' is empirically about 6%, so the whistle will speak one semitone lower than you might believe from L alone.”
Liljencrants also provides a useful scale (Fig 5) that allows one to either choose a note and hence work out what length bell is required or choose a length and see what note that will generate. (See also Bob Bramson's article for another Length/Frequency calculation chart here)
 |
The key symbol indicates that a 305 mm long whistle bell should produce a note of C, although that would be on compressed air. The value for steam would be different (see adjustment bar) and to get the same note the length would need to be 356 mm.
The next major dimension is the inside diameter of the bell. Liljencrants (2006) suggests “that a good rule is to select a 3:1 scaling, diameter D should be one third of the length L, D = L/3.” He goes on to suggest that for a loud whistle “the mouth area should be about the same as the bell cross section. For the basic design with 3:1 scale and a mouth extending all around the bell this automatically means the Cut Up H should be one twelfth of the length, H = L/12 = D/4. With a lower cut up you must hold back blowing power to avoid over blowing, and with a higher one the jet loses relatively more of its energy into turbulence under way to the upper lip”.
Another key dimension is the width of the Windway or slit. Liljencrants (2006) suggests that “the slit width T should be set in proportion to L, … (and)... that it should be inversely proportional to pressure P.” He goes on to provide a chart from which one can obtain the value for T if one knows the pressure of the medium that activates the whistle. Awkwardly for non technical readers the X scale is in WC which is water column inches and kPa which are Kilopascals. Since the X scale only goes up to 50 kPa, which is 7.25 PSI, the chart is not shown here.
Clearly another ‘rule of thumb’ is required to guide the choice of Windway width. Looking at a number of discussion forums it would seem that there is some disagreement over the ‘correct’ size of this slot. In Figure 1 and Figure 4, which use a close fitting pipe over the main body pipe, the Windway defaults to the thickness of the metal used in the main body pipe. Bob Bramsom suggest that 0.5mm will work fine for most whistles, but other disagree. Fender, a poster on the Home Machinist Forum, suggests “the overblowing problem can be cured by making the slit width narrower for higher pressures. Lower steam pressures require a wider slit.”
The latter point is supported by Weisenberger (2001) who found that “the acoustical output of a whistle is much more dependent upon the flow rate rather than the actual operating pressure, thus if you use a relatively large air slot width of 1/16 in. and large diameter inlet, whose area exceeds the slot area, you could get the required flow rate at relatively low pressure. Thus, the operating efficiency of a whistle could be greatly increased over that of the traditional high pressure steam whistle.” This rather suggests that for steam launch whistles which are not mounted on the top of the boiler, a large supply pipe would be essential as would a fairly wide windway. Weisenberger’s suggestion comes with the proviso that “you gain nothing by making the mouth area larger than the whistle's cross-sectional area other than allow high pressure operation without overblowing. You do not get more output.”
McDaniel (2011), explicitly speaking in the context of organ pipe whistles, suggest that “when the mouth area is equal to the bell's cross-sectional area, the whistle is said to have ‘unity cutup.’" He goes on to point out that “Unity cutup provides maximum sound output for minimum air/steam consumption. Less than unity cutup decreases sound output while consuming air/steam at the same rate as unity cutup. For example, reducing cutup height to one-half unity cutup decreases sound output by a factor of sixteen while using the same amount of air/steam as unity cutup.”
McDaniel (2011) goes on to discuss the air slot width, drawing upon the formulae developed by Weisenberger for organ pipe whistles. The formula is:
 |
Taking the three organ pipe designs mentioned earlier it is possible to work out the ‘theoretical’ Windway slit and compare it to the slit as shown in the design. The assumed psi used was 90. (See table below):
|
|
Giangrandi |
Bramson |
McDaniel |
|
Working Length |
9.06 |
3.75 |
4.5 |
|
Bell ID |
0.79 |
0.75 |
1.25 |
|
Scale |
11.50 |
5 |
3.6 |
|
Cutup |
0.79 |
0.75 |
1.42 |
|
% of outside Circumference |
32% |
50% |
25% |
|
Mouth width |
0.79 |
1.24 |
0.98 |
|
Bell inside cross section area |
1 |
0.44 |
1.23 |
|
Cutup Area |
0.62 |
0.93 |
1.23 |
|
Unity Cutup? |
1.6 |
0.5 |
1 |
|
Actual Windway slit |
0.04 |
0.02 |
Not given |
|
Windway slit Formula |
0.0066 |
0.0153 |
0.0212 |
This table suggests that slavish adoption of the Formula is probably not sensible, but it is a useful starting point. In the section above it was mentioned that the size of the Windway slot should also be related to the operating pressure. To see if that makes much difference to the Formula results the calculations were re-run at 30psi, 60psi and 90psi. All ‘answers’ in inches.
|
Pressure |
Giangrandi |
Bramson |
McDaniel |
|
30 psi |
0.0115 |
0.0265 |
0.0368 |
|
60 psi |
0.0082 |
0.0187 |
0.0260 |
|
90 psi |
0.0067 |
0.0153 |
0.0212 |
This would seem to support the proposition that as the pressure drop so the Windway slit should be widened. However, the differences are modest and perhaps the advice on steam volume is more important. That was not tested as I have neither a source of steam nor a whistle to test.
Having worked through all this material the next question is whether it provides enough data with which to design a whistle that ought to work on the mono-tube boiler.
The whistle is to be mounted on the top of the casing in front of the funnel. This is to keep steam and noise away from the skipper but necessitates a supply pipe of 390mm. Its OD will be 5/16” since I have a spare coil of that OD and it is slightly larger than the main steam pipe from the mono-tube which is ¼” OD. Following the advice of Bramson (2020) the Internet was searched for thin walled brass tube. Eventually a vendor of 25 x 0.5 x 500mm was found and a piece ordered. With some difficulty a vendor of 24 mm round brass bar was found who was willing to sell as little as 100mm and that was ordered.
Based upon the 3:1 rule mentioned above it would seem that the working length of the whistle should be 72mm. From Liljencrants diagram that will produce a B note right at the top end of the musical scale. Larrick (2011), in discussing his model locomotive whistle points out that “The smaller the (Scale) number, the better the sound. A whistle with a scale of four is a BIG whistle, ... However, out of concern for it being too loud (and draining the boiler), I settled for a scale of roughly six, which John (McDaniel) had told me was about as high as I would want to go and still get a good sound.” Denis Larrick was developing a chime whistle comprising three differently tuned organ pipe whistles, all fed off a 5/16” pipe at 90 PSI. He summarised his parameters in the table below:
B FLAT MINOR UNITY CUTUP CHIME WHISTLE
|
Frequency |
466.16 Hz |
559.39 Hz |
699.24 Hz |
|
Note |
B Flat 4 |
D Flat 5 |
F Natural 5 |
|
Working Length (WL) |
8.99” |
7.49” |
5.99” |
|
Tube (I.D.) |
1.53” |
1.29” |
1.06” |
|
Scale (WL / I.D.) |
5.87 |
5.8 |
5.82 |
|
Mouth CUTUP (MC) |
1.53” |
1.29” |
1.06” |
|
Steam Pressure |
90 PSI |
90 PSI |
90 PSI |
|
Slit Width (SW) |
0.013” |
0.013” |
0.013” |
The evidence above suggests that it might be advantageous to ignore the 3:1 rule and seek a lower pitched whistle at the cost of it not being quite so loud. Bagley (1953) points out that “The diameter of a whistle tube determines the volume of sound. It does not affect the note. You can get all the necessary noise out of a tube 3/8 inches in diameter.” Larrick’s smallest whistle is 26mm diameter and 152 mm long which is close to the pipe size that I will have available so it would be possible to have a larger WL and an adequate level of sound. Going for Scale of 6 the Working Length of my whistle would become 144 mm which looks like note C at 512 Hz from Liljencrants diagram.
The area of the circle comprising the inside of the tube is 452.389 sq mm and is thus the target area for the mouth. Making this a 90 degree whistle would mean that the mouth must be 18.85 mm across and hence the cut up by calculation would be 24 mm. This gives unity cutup which is the optimum for sound and steam consumption.
The remaining key design parameter is the Windway slot. By changing the dimensions into Imperial measure the data can be entered into the formula.
|
Parameter |
Inches |
Metric |
|
Length (Wl) = |
5.67 |
144.02 |
|
Inside D |
0.95 |
24 |
|
Scale = |
6.00 |
6 |
|
Pressure = |
90 |
6.21 Bar |
|
Ws = |
0.01276 |
0.32 |
The outcome of this calculation is a suggested Windway slit of 0.013” which is the same as that used by Larrick (2011). It would appear that the material I have ordered could become a reasonable sized whistle that makes a moderate degree of noise with a pleasant enough note. However, there will probably have to be some tuning to do when steam is available.
At this point all the necessary parameters for the construction of a whistle for the mono-tube boiler are available. The final stages are to draw it up in CAD and then create it in metal. The success of that process, or otherwise, will be reported in another article in the future.
References
1. Giangrandi I. (2012) A Steam Whistle, [https://www.giangrandi.org/mechanics/steamwhistle/steamwhistle.shtml] Accessed 24 July 2024
2. Bert (AKA mygrizzly1022) (2011) [https://www.homemodelenginemachinist.com/threads/steam-whistle-drawings.11716/]
3. Liljencrants J. (2006) Basic Hooter Whistle [http://www.fonema.se/whistle/hotwhiz.html] Accessed 24 July 2024.
4. Lautard G. (1988) The Machinist’s Second Bedside Reader, Guy Lautard Publishing, p. 134
5. (a) Bramson R (2010) Wheezeless Whistles, SMEE Journal,Volume 18 - Number 3 - May
(b) Bramson R (2020) Wheezeless Whistles, Model Engineer, Vol 205 (4388), p. 471
6. Weisenberger R.J. (2001) Flue Pipe Acoustics, Carousel Organ, Issue No. 7, April.
7. McDaniel JR (2011) Designing Air Steam Whistles & Chimes, Live Steam & Outdoor Railroading, May/June issue, p 28.
8. Larrick D (2011) The Fifth & Final Whistle, Live Steam & Outdoor Railroading, May/June issue, p 24.
9. Bagley R B (1953) Fools dive in where angels know better…! The Miniature Locomotive November-December (re-printed on International Brotherhood of Live Steamers site - http://ibls.org/mediawiki/index.php/Dick_Bagleys_Steam_Whistle)
© 2024 Peter Cuthbert